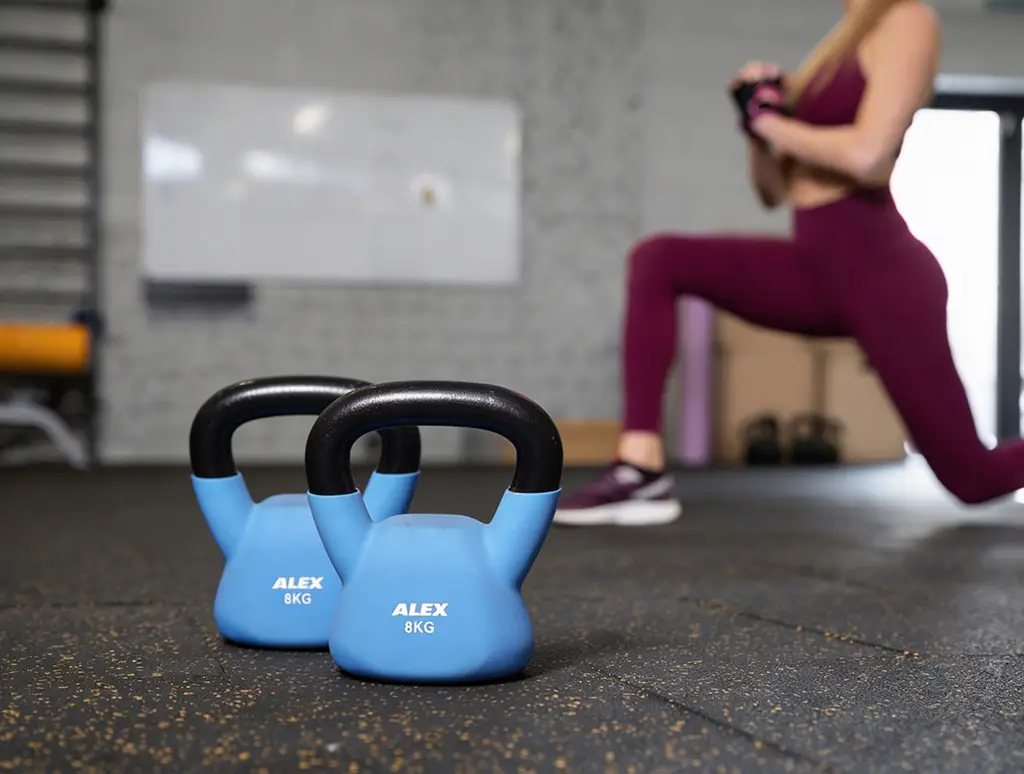
Kettlebell branding has evolved significantly over the past decade. Where once a simple silk-screened logo or embossed weight marking was the standard, premium fitness brands now specify full-color, high-resolution UV-printed graphics that span the curved body of a CPU-coated kettlebell with photographic clarity and lasting adhesion. UV printing on CPU kettlebells is a technically demanding decoration process that combines the precision of flatbed UV printing, the chemistry of ink-to-polyurethane adhesion, and the manufacturing logistics of curved-surface printing in high-volume production — and when executed correctly, it delivers a branding outcome that no sticker, vinyl wrap, or silk screen can match for quality, durability, or visual impact.
This article provides a complete process walkthrough of UV direct printing on CPU-coated kettlebells, from the CPU coating substrate preparation through printer setup, ink selection, curing, adhesion testing, and quality control. For OEM buyers developing branded kettlebell programs, brand managers specifying decoration requirements for custom products, and procurement teams evaluating manufacturer capability, this walkthrough provides the technical foundation for informed decisions about what UV printing can achieve, what it requires, and what distinguishes excellent execution from mediocre results.
Why CPU Coating Is the Ideal UV Printing Substrate
Not all kettlebell coatings are equally suitable for UV direct printing. The substrate’s surface chemistry, hardness, and surface energy all affect how well UV ink adheres — and how long that adhesion maintains its integrity under the mechanical and chemical stresses of commercial gym use. CPU coating’s material properties make it an excellent UV printing substrate for reasons that are worth understanding before examining the printing process itself.
Surface Energy and Ink Adhesion
UV ink adhesion requires sufficient surface energy on the substrate to allow the ink to wet and spread before curing. High-end CPU manufacturers use MDI-based (Methylene Diphenyl Diisocyanate) polyurethane rather than cheaper TDI-based alternatives. MDI offers superior tear strength and better long-term resistance to the oils and sweat found in a gym environment. MDI-based CPU surfaces have higher surface energy than TDI alternatives — which directly translates into better UV ink adhesion without aggressive primer application. On MDI CPU surfaces, a simple isopropyl alcohol surface cleaning is typically sufficient preparation for UV printing, avoiding the cost and process complexity of primer application steps required on lower-energy substrates.
Surface Hardness and Print Register Stability
CPU coating’s relatively high Shore A hardness (typically 55–75 Shore A for commercial kettlebell applications) provides a dimensionally stable printing surface that does not deform under the light pressure of printhead contact — maintaining accurate print register across the curved surface. Softer rubber coatings (30–50 Shore A) flex and deform under printhead contact, producing print register errors and edge bleed that are difficult to control in high-resolution graphic applications.
The CPU surface’s dimensional consistency is also important for the fixture design that positions kettlebells in the printer: a CPU kettlebell’s outer dimensions are more consistent unit-to-unit than rubber alternatives, because the casting and curing process produces tighter dimensional tolerances. This consistency allows fixtures to be designed with tighter positioning tolerances, which improves print registration accuracy across a full production batch.
Chemical Compatibility with UV Inks
UV inks cure through a photopolymerization reaction — the ink’s photoinitiators absorb UV light energy and initiate a rapid cross-linking reaction that solidifies the ink layer in milliseconds. The cured ink layer’s adhesion to the substrate depends on the chemical compatibility between the cured polymer network and the substrate surface. CPU polyurethane’s polar urethane linkages create chemical affinity with the polar functional groups in many UV ink formulations, producing adhesion that becomes stronger with time (as the ink’s residual polymerization continues for 24–48 hours after initial UV cure) rather than weakening.
Step 1: Core and Coating Preparation
UV printing on CPU kettlebells begins not at the printer but at the casting and coating stage — the quality of the printed output is fundamentally determined by the consistency of the substrate it is applied to. Kettlebells with surface defects in the CPU coating (voids, bubbles, ripples, or adhesion failures at the core-to-coating interface) will produce printed output that highlights rather than conceals those defects.
Core Casting Quality
A world-class CPU kettlebell factory’s manufacturing process begins with high-precision gravity casting. Unlike sand casting, which can leave internal air pockets and structural voids, gravity casting ensures a dense, solid iron core. The casting quality of the iron core affects the CPU coating uniformity because air pockets or surface irregularities in the casting produce corresponding surface contours in the CPU coating — creating local variations in coating thickness that are visible in the finished printed product. Brands specifying UV-printed CPU kettlebells should confirm that the manufacturer uses gravity casting (or vacuum casting for the highest quality) rather than sand casting for the core.
CPU Application and Curing
The CPU coating is applied by casting the liquid two-component polyurethane around the iron core in a mold that defines the final kettlebell shape. After demolding, the coating undergoes an initial cure (typically 16–24 hours at ambient temperature) and a post-cure (4–6 hours at elevated temperature, typically 60–70°C) to fully develop the mechanical properties of the polyurethane. Only after complete post-cure should surfaces be considered ready for UV printing — printing on under-cured CPU produces adhesion failures because the surface chemistry is still reactive and does not have stable bonding sites for the UV ink polymer.
The surface of the post-cured CPU coating must be inspected for molding defects before being cleared for printing: check for surface voids (small craters from air entrapment during casting), parting line flash (thin fins of material at the mold parting surface), and coating adhesion failures (areas where the CPU has not bonded to the iron core and shows as a soft spot under pressure). Any defective units should be rejected from the printing batch rather than printed and inspected after — post-print identification of coating defects wastes expensive print consumables and print time.
Step 2: Surface Preparation Before Printing
Surface preparation is the step most frequently underinvested in kettebell UV printing programs, and it is the step that most directly determines long-term adhesion performance. The CPU surface arriving at the printer carries contaminants from the manufacturing process — mold release agents, handling oils, atmospheric dust, and outgassing residues from the post-cure cycle. All of these contaminants reduce effective surface energy and impair ink adhesion.
Cleaning Protocol
In many cases, only a simple alcohol wipe is required prior to UV printing for cleaning and static reduction. For CPU kettlebell surfaces, an isopropyl alcohol (IPA) wipe using lint-free cloths — applied thoroughly to the full print area and allowed to fully evaporate before printing — is the standard preparation step. The cleaning must be comprehensive: partial cleaning leaves contamination patterns that produce visible adhesion variations in the printed output. Establish a defined cleaning protocol (specific IPA concentration, application method, dwell time, and drying confirmation) as a production standard rather than leaving it to operator judgment.
Static charge accumulation on CPU surfaces can cause UV ink spray interference — repelling or attracting ink droplets before they land on the surface — producing visible print artifacts. Anti-static treatment (using an ionizing air gun directed at the surface immediately before printing) is recommended for high-resolution graphics where even minor droplet placement errors are visible. This is a low-cost step that significantly improves print quality consistency in production environments.
Primer Application: When Required
Some UV ink formulations — particularly those optimized for maximum color gamut or metallic effects — require a primer application before UV printing to bridge the chemical compatibility gap between the ink and the CPU substrate. Primers are typically applied by spray, allowed to dry for a defined flash-off time, and then overprinted with the UV color layer. Primer addition adds a process step and approximately 15–25 minutes to the per-batch processing time but can significantly improve adhesion performance for difficult ink-substrate combinations.
The decision to use primer should be based on adhesion testing of the specific ink-substrate combination rather than assumed. If the adhesion testing protocol (described later in this article) demonstrates acceptable adhesion without primer, primer addition adds cost and process complexity without benefit. If testing shows inadequate adhesion without primer, primer is mandatory — not optional — for any application claiming durable UV printing performance.

Step 3: Fixture Design and Printer Setup
The geometric challenge of UV printing on CPU kettlebells is the surface curvature — the kettlebell body is a three-dimensional curved surface, not a flat substrate. Conventional UV flatbed printers are designed for flat-surface printing; adapting them for curved kettlebell printing requires careful fixture design that positions the print surface within the printer’s effective working height range.
UV Flatbed Printing Technology for Curved Surfaces
Advanced high-gap UV printing technology expands UV flatbed printing from a flat-surface process into a scalable platform for advanced dimensional product decoration. This dramatically expands the range of products manufacturers can decorate without changing equipment. Commercial UV flatbed printers suitable for kettlebell printing have a printhead-to-substrate gap (the clearance between the printhead and the surface being printed) that determines the maximum surface relief the printer can accommodate. For kettlebell printing, this gap must be sufficient to accommodate the curved surface height variation across the print width — typically 15–30mm of height variation across the kettlebell body width at the print position.
High-gap UV printers (capable of 30–80mm gap operation) are the appropriate technology for kettlebell body printing. Printers with only 8–15mm gap capability — standard for flat-surface commercial graphic printing — cannot accommodate the kettlebell’s curved surface without the print area being limited to a very narrow strip near the surface apex where the curvature-induced height variation stays within the printer’s gap tolerance.
Fixture Engineering
Custom fixtures are required to hold each kettlebell at the precise position required for print registration accuracy and surface distance consistency across the print area. The fixture must accomplish three objectives simultaneously: position the kettlebell so that the print area surface is within the printer’s gap tolerance across the full width of the graphic; hold the kettlebell securely against the vibration of the printer carriage passing overhead; and allow efficient loading, unloading, and cleaning between print cycles.
For batch production, fixtures are typically designed to hold 4–8 kettlebells simultaneously on the printer bed — maximizing production throughput per print cycle. The modular fixture architecture allows the same printer bed to accommodate different kettlebell sizes (different weights = different diameters) by swapping fixture inserts, reducing the setup time between size changes in a multi-SKU production run.
Print File Preparation and Color Profiling
UV printing artwork must be prepared specifically for the curved surface geometry of the kettlebell, not simply placed on a flat canvas. The graphic must be mapped to account for the surface curvature — graphics that appear correct when viewed flat will appear distorted when printed on a curved surface if the flat-to-curved geometric compensation is not applied in the file preparation stage. This compensation is typically applied in the RIP (Raster Image Processor) software that drives the printer, using a distortion profile specific to the kettlebell diameter and print position.
Color profiling — generating an ICC color profile for the specific ink, substrate, and printer combination — is essential for consistent color reproduction across production batches. Without a verified ICC profile, the printed colors will drift from the artwork reference, producing color inconsistencies between production batches and between different printers if production scales to multiple machines. Brands specifying Pantone or brand color matches in their UV printing programs should verify that their OEM manufacturer has completed the color profiling process for their specific ink-substrate combination before production commitment.
Step 4: The UV Printing Process
With fixtures loaded, surfaces cleaned, and print files verified, the UV printing process begins. The printer carriage moves across the loaded kettlebell fixtures, depositing UV-reactive ink droplets precisely at defined positions. Immediately after deposition, UV LED lamps mounted on the carriage cure each ink layer, polymerizing the ink in place before the next carriage pass deposits the subsequent layer.
Multi-Layer Printing and Special Effects
UV printing on CPU kettlebells typically involves multiple ink layers for full graphic depth and durability. A standard production sequence might involve: a white underbase layer (to provide a reflective base for color saturation on the dark CPU surface), CMYK process color layers (to build the full-color graphic), and a clear protective topcoat layer (to protect the color layers from abrasion and cleaning chemical exposure). Premium programs may add metallic or gloss spot effects — applied as additional layers on specific graphic elements.
UV and UV-DTF printing innovations have captured attention for their ability to create high-perceived-value imprints and special effects for hard goods. Because it’s UV ink, special effects like gloss and texture are achievable — you can build up layers of ink. For kettlebell branding programs that incorporate premium visual effects — raised texture, high-gloss spot finishes, or color-shifting metallic elements — these additional ink layers require correspondingly longer print cycles per unit but produce a product differentiation level that competitors without UV printing capability cannot match.
UV LED Curing: Immediate Solidification
Unlike solvent-based inks that require drying time after application, UV inks cure immediately under UV light exposure — polymerizing from liquid to solid in milliseconds. This immediate cure provides several production advantages: there is no wet ink smear risk between printing and handling, print quality is fixed before the unit leaves the printer, and no drying oven or extended cure time is required. The cured ink is immediately dimensionally stable, allowing handling and inspection immediately after printing.
UV LED lamps (as opposed to traditional mercury UV lamps) have become the standard for commercial UV printing because of their lower heat output, longer lamp life (typically 10,000–20,000 hours versus 1,000–2,000 hours for mercury lamps), and more consistent UV output over their operating life. The lower heat output of LED lamps is particularly relevant for CPU kettlebell printing: excessive heat during curing can cause micro-shrinkage in the polyurethane substrate, creating surface stresses that reduce adhesion of the cured ink layer.

Step 5: Post-Print Quality Control
After printing and immediate UV cure, each kettlebell undergoes a quality inspection sequence that verifies the printed output against the approved artwork reference and confirms that adhesion performance meets specification.
Visual Inspection
Visual inspection should compare the printed output to a calibrated reference print produced at the time of artwork and color profile approval. Specific inspection criteria include: color accuracy against the Pantone or CMYK reference (evaluated under D65 standardized daylight illumination, not fluorescent lighting which distorts color perception), print registration accuracy (the alignment of individual ink layers should produce no visible color fringing at edge boundaries), graphic element sharpness (text and fine line elements should have clean, unbroken edges), and surface coverage uniformity (no missing areas, streaks, or density variations across the full graphic area).
Adhesion Testing
Adhesion testing is the quality control step that confirms the UV print will survive commercial gym use — not merely that it looks correct immediately after printing. The peel strength or adhesion rating of polyurethane coatings is measured using industrial force gauges to ensure that even if the kettlebell is gouged by other equipment, the coating will not bubble or start to delaminate. For UV print adhesion specifically, the standard test method is the cross-cut adhesion test (ASTM D3359):
- Score a 5×5 grid of 1mm cuts through the ink layer to the substrate using a cross-cut cutter tool
- Apply 3M 610 tape firmly over the scored area and press to ensure full contact
- Pull the tape off rapidly at 90°
- Inspect the scored area: rating 5B (no ink removed), 4B (<5% area ink removed), 3B (5–15% removed), 2B (15–35%), 1B (35–65%), 0B (>65%)
- Commercial gym application minimum requirement: 4B rating or better
This test should be performed on a sample from every production batch — not just the first batch approved at the sample stage. Adhesion can drift between batches if surface preparation quality varies, ink batch specifications change, or ambient conditions (temperature, humidity) during printing affect the curing process. A batch that fails the 4B adhesion minimum should be rejected and the root cause investigated before production continues.
Abrasion and Chemical Resistance Testing
Beyond adhesion, commercial UV printing on kettlebells must resist the mechanical abrasion of daily handling and the cleaning chemicals used in gym environments. A practical production-level abrasion test involves rubbing the printed surface with a lint-free cloth dampened with the specific cleaning solution used in the target facility — applying moderate pressure for 50 strokes and evaluating for color transfer to the cloth or visible surface damage. Formulations that show significant color transfer or surface gloss change at this test level will not maintain their appearance in 6 months of commercial facility use.
| Process Stage | Key Action | Quality Checkpoint | Failure Mode to Prevent |
|---|---|---|---|
| Core casting | Gravity or vacuum casting (no sand casting) | Surface void inspection after demolding | Substrate irregularities visible through print |
| CPU coating | Full post-cure before printing (16–24hr + 60°C bake) | Shore A hardness verification; surface void check | Under-cure causing adhesion failure |
| Surface cleaning | IPA wipe + anti-static treatment | Visual surface uniformity check before printing | Contamination-related ink adhesion failure |
| Fixture setup | Position within printer gap tolerance; verify registration | Test print registration before production batch | Geometric distortion or layer misregistration |
| UV printing | White underbase → CMYK → clear topcoat layers | Color reference comparison under D65 illumination | Color drift or layer misregistration |
| Adhesion QC | Cross-cut tape test (ASTM D3359) per batch | Minimum 4B rating required for commercial approval | Premature ink delamination in use |
| Abrasion QC | 50-stroke cleaning agent rub test | No visible color transfer or surface damage | Print fading under commercial cleaning |

OEM Program Considerations for UV-Printed CPU Kettlebells
For brands developing private-label UV-printed CPU kettlebell programs through OEM manufacturing, several commercial and logistical considerations shape the program structure:
Artwork Preparation and Approval
For printing design, manufacturers need an AI or PDF file to set up the print plate. More specifically, UV printing programs require: vector artwork files (AI, EPS, or PDF) rather than raster files for best print sharpness at the sizes printed on kettlebells; color specification in CMYK values or Pantone references (not RGB, which does not translate reliably to print output); a defined Pantone reference for any color-match requirements; and clear specification of which elements receive white underbase, color, gloss spot, or other special treatment layers. Artwork that arrives in screen-format RGB or at insufficient resolution for the print size will require correction before print setup — adding lead time to the OEM production program.
Minimum Order Quantities
UV printing setups — fixture design and fabrication, color profile development, test print and approval cycles — have fixed costs that are amortized across the production run. For programs with a single graphic design applied consistently across a weight range, MOQ is primarily determined by the kettlebell casting and coating economics (typically 200–500 units per denomination). For programs with multiple graphic variants or colorways, the per-variant setup costs add a meaningful MOQ consideration: running 5 different graphics on a 200-unit batch is operationally different from 1 graphic on 1,000 units, and pricing reflects this difference.
Lead Time Implications
UV printing adds approximately 3–7 days to standard CPU kettlebell production lead time: 1–2 days for artwork setup and test print approval, 1–3 days for production batch printing (depending on volume and number of ink layers), and 1–2 days for adhesion QC and final inspection. For OEM buyers building production schedules, UV-printed kettlebell programs should be planned with 5–10 additional days compared to standard CPU kettlebell programs. Our complete CPU-coated kettlebell range is available for UV printing under OEM branding programs, including custom graphic development support from our product team.
Frequently Asked Questions
What types of graphics work best for UV printing on CPU kettlebells?
Bold, high-contrast graphics with distinct color boundaries work best on the curved CPU kettlebell surface. Fine text (below 6pt) and very thin line elements (below 0.5mm stroke) can be difficult to render with full sharpness on curved surfaces due to the geometric distortion compensation required. Full-coverage background graphics benefit from a white underbase layer to maximize color saturation on dark CPU surfaces. Photorealistic imagery is achievable with quality UV flatbed printers but requires careful color profile calibration to maintain fidelity on the curved substrate.
How long does UV printing on CPU kettlebells last in commercial gym use?
UV printing with verified 4B adhesion on MDI-based CPU coating, with a clear topcoat protective layer and cleaning agent resistance confirmed at QC, is expected to last 3–5 years in typical commercial gym use before noticeable color fading or edge lifting. This durability is significantly better than vinyl stickers (typically 1–2 years) and silk screen printing (which lacks the topcoat protection layer). The actual lifespan depends on cleaning chemical frequency and aggressiveness, handling conditions, and the specific UV ink formulation used.
What is the difference between UV printing and silk screen printing on kettlebells?
UV printing deposits ink directly onto the CPU surface using a digital flatbed process — no physical printing plate is required, enabling full-color photographic graphics and quick changeovers between designs. Silk screen printing applies ink through a mesh stencil, one color per screen, making it more cost-effective for simple 1–2 color logos at high volume but unable to achieve photographic color depth or fine gradients. UV printing requires higher setup investment but offers superior color capability and no minimum run size per design variant, making it better suited for multi-color branded programs and small batches of diverse designs.
Can UV printing be applied over embossed or molded logo details on CPU kettlebells?
Yes — UV printing can be applied over existing molded or embossed surface details, but the surface relief of the embossing creates height variation that must be within the printer’s gap tolerance. For embossed logos with height relief under 2–3mm, standard high-gap UV printing typically accommodates the surface variation. For deeper embossed elements, the artwork must be designed to work with the emboss geometry rather than overlap it, as ink coverage over deep embossing tends to bridge the relief rather than conforming to it.
What file formats should I provide for UV printing artwork on CPU kettlebells?
Provide vector artwork files in AI (Adobe Illustrator), EPS, or PDF format for best print sharpness. Specify colors in CMYK values or Pantone references — not RGB. Include a separate layer for each ink type (color, white underbase, clear topcoat, gloss spot) if requesting special effects. Provide a reference proof print or PDF for color approval comparison during test print stage. Raster images embedded in the artwork should be at minimum 300 DPI at the actual print size to avoid visible pixelation in the finished printed output.
Conclusion
UV printing on CPU-coated kettlebells is one of the highest-value branding investments available to fitness equipment brands developing premium product lines. The process — from substrate quality through surface preparation, fixture engineering, multi-layer printing, and adhesion QC — is technically demanding, but when executed with appropriate manufacturing discipline, it delivers a decoration quality that is immediately recognizable as premium and a durability profile that supports the warranty commitments and customer lifetime value that premium product positioning requires.
For brands ready to develop a UV-printed CPU kettlebell program — whether a new line launch, a limited edition release, or a fleet-wide rebranding of an established product range — our team is available to review artwork requirements, discuss program specifications, and provide sample production approval support for UV printing integration into your OEM kettlebell program.